
I LOVE to papier mache - it's easy, inexpensive, a little bit messy, and a lot of FUN... and eco-friendly, too!
For the nest, you will need a small pile of newspaper strips (strips approx 1" x 2"), a plastic bowl (for the form), equal parts flour & warm water (for the paste), and a spoon (to stir)
 To make 2 birds, you will need: 4 cotton balls, 4 felt triangles (about 1/2"), 4 googly eyes, a bunch of feathers, and glue
 First, let's make the papier mache paste. You may want to cover your workspace with a plastic covering and put on a smock, this is going to be messy!
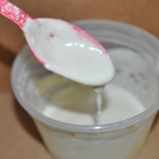


Slowly add the flour into the warm water (warm, only because it feels better than cold!) – mixing well with a spoon. Make sure it's not too runny and not too lumpy. You want your paste to be a good, smooth consistency.
Now it's papier mache-time! We are going to be using the plastic bowl as our form. Turn the bowl upside down – we are going to be papier mache'ing on the outside of the bowl.
Taking one strip of newspaper at a time, dip your finger into the papier mache paste and spread it on to the strip.
 Put the first strip on the bowl, starting at the top, smoothing down all the edges. Continue adding strips of newspaper covered with the paste, one at a time, overlapping them as you go along. Make sure you smooth the strips down on all edges.
 Cover the entire bowl with strips. It is important to add a 2nd & 3rd layer for a good sturdy nest. Remember to continue to smooth all edges down as you go along.
 Once the bowl is completely covered with (at least) 3 layers of strips, it is time to let dry.
Taking one strip of newspaper at a time, dip your finger into the papier mache paste and spread it on to the strip.


While the bowl is drying, it is a good time to make the birds...
First, attach 2 cotton balls together with a small dot of glue.

First, attach 2 cotton balls together with a small dot of glue.
Then, take 2 triangles, and hold them together, and put some glue on the edge. Decide where you want the birds beak to be, and push them on to the cotton balls, and hold in place.
Put a little glue at the bottom of a few feathers, one at a time, and gently push them in between the 2 cotton balls, then hold in place.
Put a small dot of glue where you want the eyes, and put the googly eyes in place.
Voila (that's french for "here it is!") ~ there is your bird!

Once the bowl is completely dry, it will be hard. It is now called the nest.
Gently pull the nest off the plastic bowl (and please remember to save the plastic bowl, it can definitely be used again!). Carefully trim the extra edges if you want a smoother look.
It is now time to decorate your nest. Acrylic paints work best. You can sponge paint, splatter paint, add puffy paints for more dimension, or beads and trimmings. It is up to you, whatever you want -– remember, you're the artist, you decide!
Once your nest is dry, you can add fluff or meshing for a cozy spot for your birdies.
Once your nest is dry, you can add fluff or meshing for a cozy spot for your birdies.
The birds are now ready for their new home.


And you are ready to display proudly!!
So simple, so cute, so Enviro-Friendly, too!
want more ARTrageous Recyclables...
go to ~> http://yougottahaveart.org/
So simple, so cute, so Enviro-Friendly, too!
want more ARTrageous Recyclables...
go to ~> http://yougottahaveart.org/
No comments:
Post a Comment